Naguel

I'm Nahuel, and these are my work experiences, ideas and thoughts as a web developer working on the eCommerce industry.

Configure the Terminal to use MAMP's PHP

Configure the Terminal to use MAMP's PHP

By default, after installation, MAMP will make its PHP binaries "available on the browser" while the Terminal will keep on using the system's PHP with its own configuration.

The idea behind changing the Command-line to start using the PHP coming with MAMP and its configuration is to be able to switch rapidly between PHP versions and to have the configuration for PHP in only one place.

Out there you can find enough guides that helps you archive this because, frankly, there are plenty of methods to get this done. This next one is how I personally do it because it's easy to implement and it also covers something most of other guides won't which is configure the Terminal to also use the same php.ini MAMP uses.

Configuring the Command-line to use MAMP's PHP

You need to edit your Terminal's Profile in order to add the following to the end:

#export PATH=/Applications/MAMP/bin/php/php7.1.33/bin:$PATH
#export PATH=/Applications/MAMP/bin/php/php7.2.33/bin:$PATH
export PATH=/Applications/MAMP/bin/php/php7.3.21/bin:$PATH
#export PATH=/Applications/MAMP/bin/php/php7.4.9/bin:$PATH

As you can see I'm adding a different line per PHP version I want to potentially have available on the Command-line (PHP 7.1.33, PHP 7.2.33, etcetera) but having them all but one (PHP 7.3.21) commented with the # at the beginning.

Every time you switch the PHP version in MAMP you should come back to the Profile and leave uncomment the same version so the Terminal and MAMP match.

Your Command-line's Profile file depends on your shell. If you are using the default Terminal coming with macOS chances are the Profile will either be ~/.bash_profile or ~/.bashrc. Mines it's ~/.zshrc because I use Oh My Zsh.

Remember that everytime you change your Profile you need to "reload" it by doing source ~/.bash_profile (or whatever file you are using).

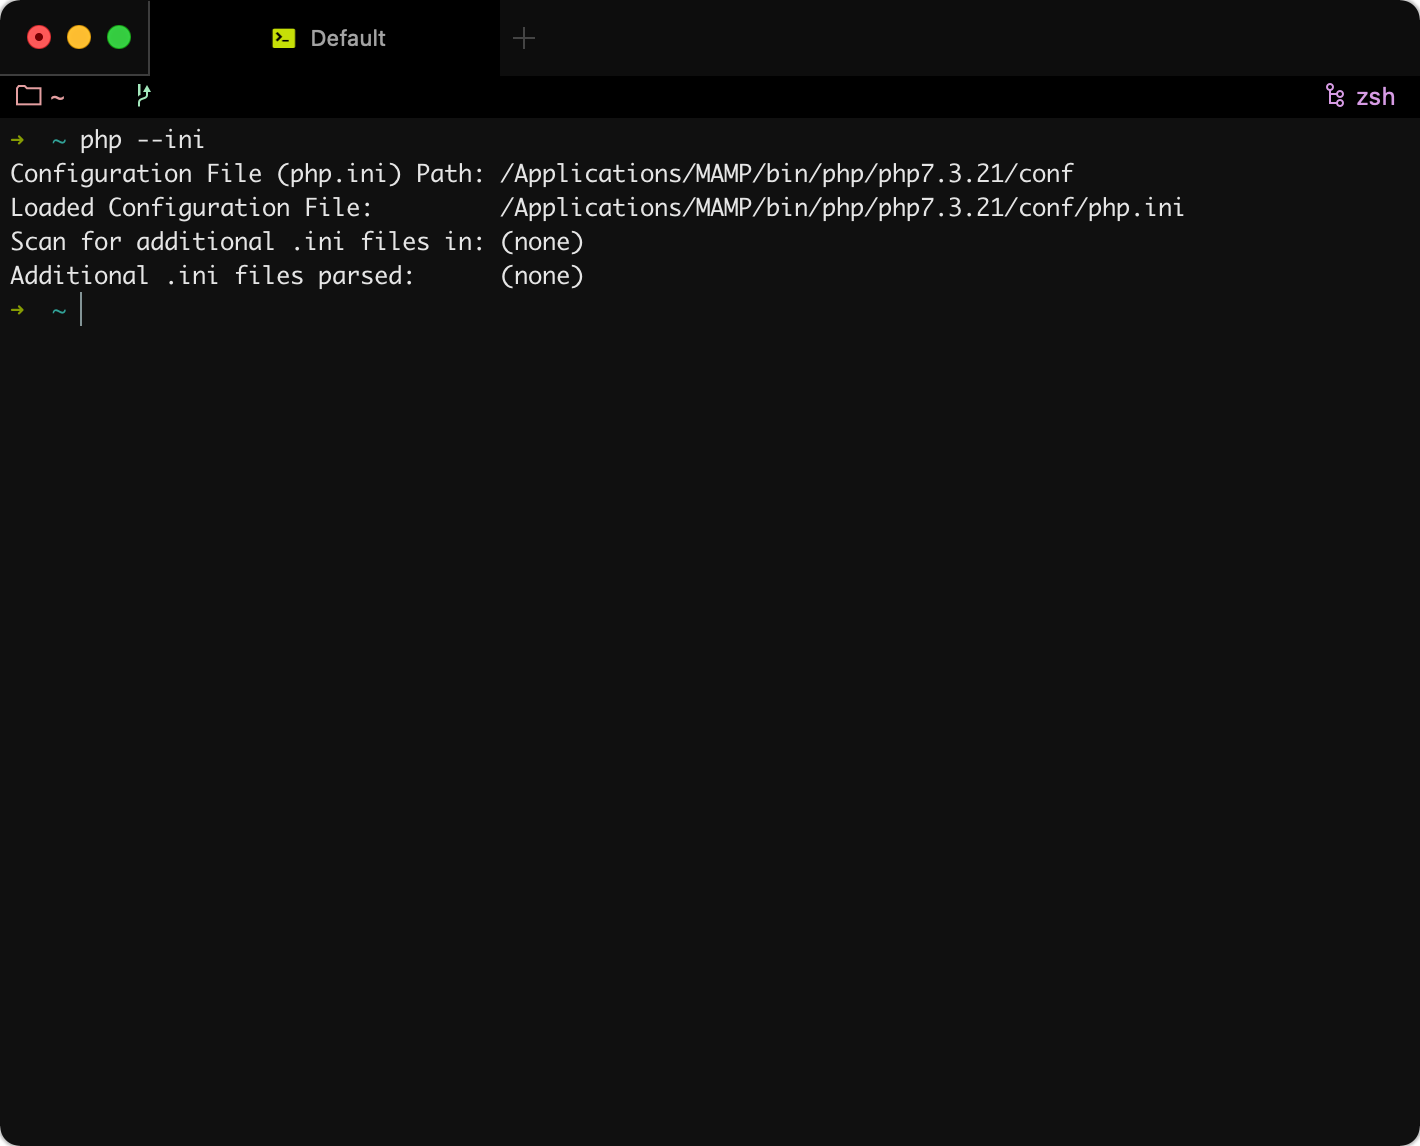
You can check if everything was applied as expected by executing php --ini and seeing the paths are pointing to MAMP.

Configuring the Command-line to use MAMP's php.ini

Here's something interesting about MAMP Pro: it generates, each time it starts, the final php.ini file it will be using during the execution as its content depends on the settings configured on the software’s UI.

For example, if you enable/disable Xdebug on MAMP by ticking/unticking the checkbox on the app, MAMP will regenerate the php.ini file with your configuration (this is basically how MAMP applies any setting change that you perform from the UI).

The final generated php.ini file is located at /Library/Application Support/appsolute/MAMP PRO/conf/php.ini.

We already configured the Terminal to use MAMP's PHP binaries but we also need to configure it to use the generated php.ini by going to /Applications/MAMP/bin/php/php7.3.21/conf (where the not auto generate php.ini file is located) and delete it (after a back up).

Then we need to create a symlink called php.ini for /Library/Application Support/appsolute/MAMP PRO/conf/php.ini (which is the auto generated one by MAMP) by doing:

ln -sf /Library/Application\ Support/appsolute/MAMP\ PRO/conf/php.ini php.ini

The conf folder should ended up looking like this:

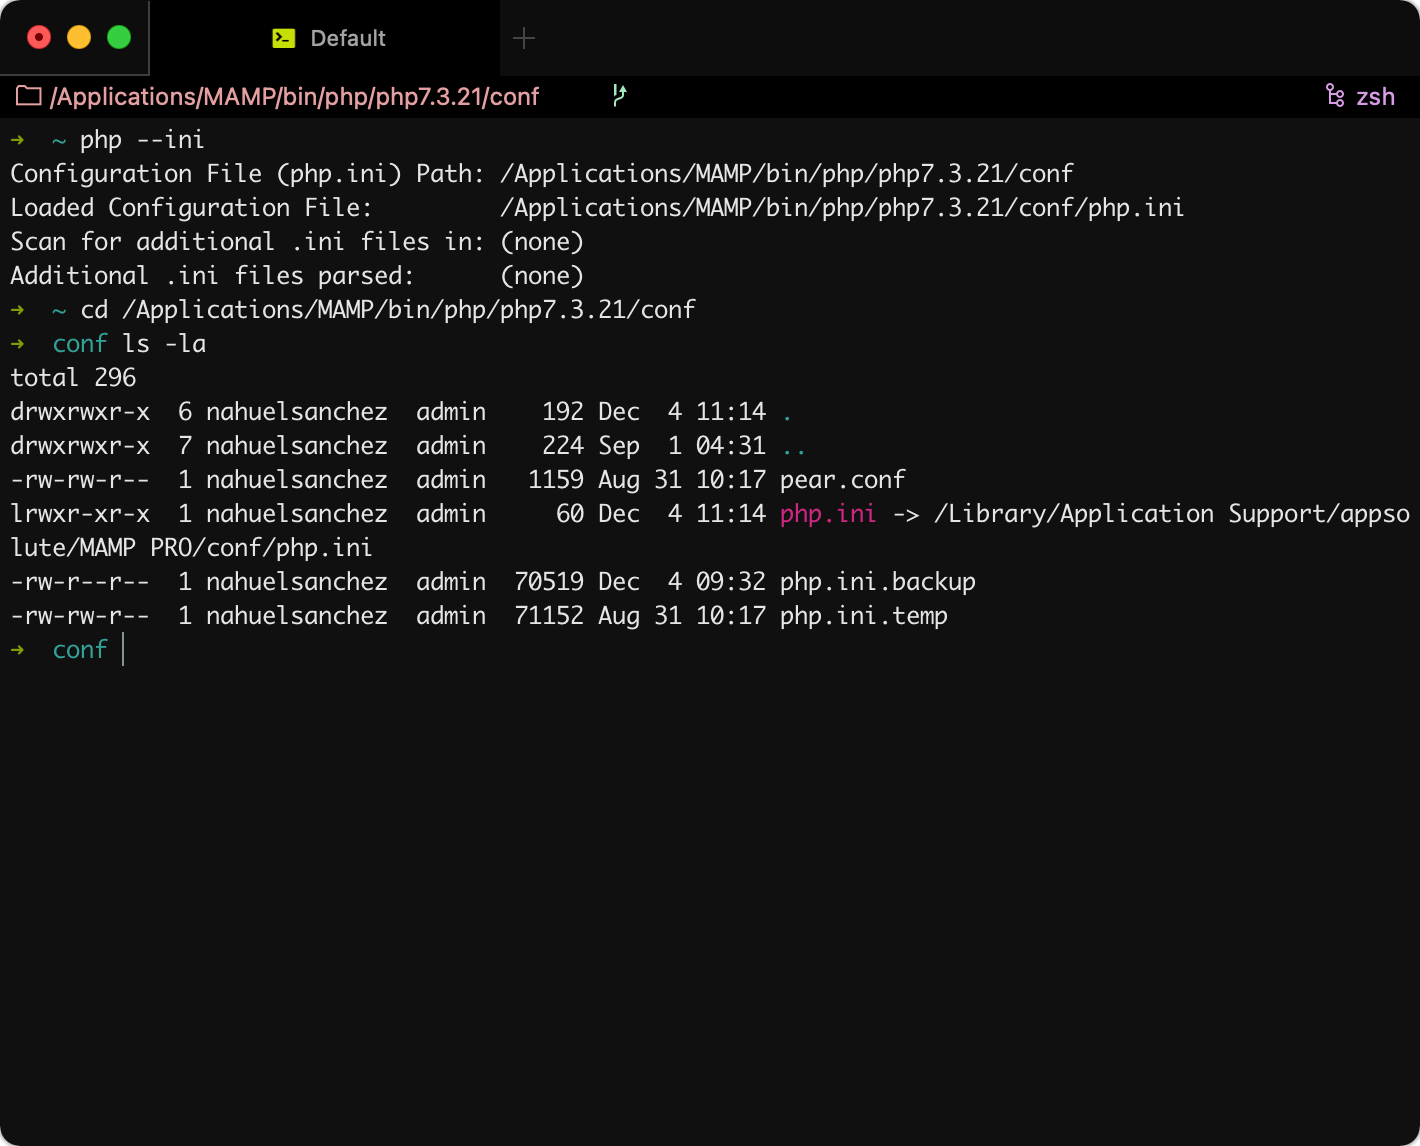
Of course the example is for PHP 7.3.21 but you will need to repeat this for the folder of each PHP version you will be using on the Command-line.

This only applies to MAMP Pro as the non-Pro version doesn't generates any php.ini and if you want to change something you need to edit the original file yourself.

Lazyload post Feature Image from Unsplash in Ghost

Lazyload post Feature Image from Unsplash in Ghost

Unsplash is a great Ghost built-in integration that allows you to quickly add an image to your posts, and I personally use it every time to add the Feature Image to all my articles (the big one below the title, before the content).

Unfortunately, out of the box the image from Unsplash is really big (2000px wide) and impacts on the page speed of the site since the browser will download the image first then continue with the rest of the page.

There's no much we can do about the image size as we can't follow the "How to use responsive images in Ghost themes" official guide because that only applies to images you manually upload and not those coming from third-parties...

Dynamic image sizes are not compatible with externally hosted images. If you insert images from Unsplash or you store your image files on a third party storage adapter then the image url returned will be determined by the external source.

...but with a little bit of HTML and JavaScript we can lazy load them to prioritize the content over the image download.

Usually, the Feature Image in the Ghost theme will look something like:

<img src="{{feature_image}}" />

This is a classic img tag with the src containing the URL of the image. But we need to do some changes here first before moving to the JS side of this technique.

In the src we are going to put a placeholder image to avoid having a broken image while the rest of the page loads, we are going to move the actual image to the data-src attribute, and finally we'll add a new class to the element.

<img src="{{asset "images/placeholder.png"}}" data-src="{{feature_image}}" class="lazyload" />

The placeholder image should be a small image in terms of weight. I'm using an image with a solid colour of 183 bytes so I can "reserve" the space of the final Feature Image to avoid "jumps" in the browser while everything loads.

Finally, the JS is quite simple. We need to wait for the window to be loaded, get all the img elements with the lazyload class, and replace the src with what's on the data-src so we trigger the actual image download.

window.addEventListener('load', (event) => {
    let images = document.getElementsByClassName('lazyload');

    for (let i = 0; i < images.length; i++) {
        images[i].src = images[i].dataset.src;
    }
});

With this in place we should see that the content is prioritized over the Unsplash image, and if we are using a placeholder we should see that first in the "Network" tab of our browser's DevTools, with the actual image loading later.

How to become a web developer in a lot of not easy steps

How to become a web developer in a lot of not easy steps

I'm being ask that a lot! No, for real, I'm not saying that for the sake of a cliche moment in the post, but the problem is that the answer is not that short nor that simple, hence this article.

Decide what's your thing

While the idea behind this how-to question is kind of the same, the answer depends exactly on what kind of developer you would like to be, because the offer is extensive out there.

I'm a web developer, a Full Stack developer that works with eCommerce platforms, so there lays my expertise, but maybe you are looking to become an iOS developer, Java developer, a videogames creator, or something else.

Clearly, the first thing you need to do is to decide that.

Take into consideration that if you are planning on making a living out of this job you will need to like it, and second you will need to investigate the job prospects of that choice you are now making (I don't think COBOL is really wanted these days, considering it's a language from 1959, for example).

Not all developers are the same, and not all guys and gals you see with code on theirs computers are creating a program for a PC (which I tend to think it's the general assumption when I say I'm a "programmer").

Start with some courses

I have to be honest here and say that I'm not impress by courses when I see them on resumes, because them alone tell me nothing. But I will assume here that you have no experience as a developer whatsoever, and that you are starting from scratch, therefore is safe to say that while a lot of courses won't land you on a job position, it's for sure the way to start.

It's the starting line not the finish line.

Based on what you decided on the last section related to what kind of developer you would like to become, now you can filter out some of the courses available all over the world.

My suggestion here is to go local, meaning pick a course provider from your city or country because they tend to have partnerships in place with IT companies in a way you can ended up as a trainee there after completing a course.

Investigate that. Not only find a course you would like to follow and suits you, but try to do it on a place (school?) that IT companies then use to recruit from.

Play around, play a lot

Courses usually end up with a real project you would be uploading into GitHub or similar.

That's not enough. From my point of view, practice beats theory.

After the course you will be on your own. Yeah, I mean, you can start a new one, but as I said before I'm not impress by courses as I expect "real" practice.

This is when you need to start building up your portfolio, meaning a GitHub with small projects, practice code, snippets, something to show, something not just only to tell others you are more than theory but also for applying that theory into real stuff, for actually keep on learning.

Do not forget courses will provide you with the basics, and you won't become a Senior developer following courses. It will be up to you, and that's with practice.

The way it happened to me is that I had a WordPress blog (not this one, another one, ages ago), with a basic theme that I wanted to customize. So I started doing small changes, then wanted more complex ones, and one thing led to another. That's how I started.

Land a job no matter the salary

With courses on your resume and a portfolio to show is time to become real. Bye bye training wheels!

Unfortunately, this is not easy, not because of the opportunities out there that I think are plenty on the IT sector, but because you will need to escape your comfort zone.

If you are reading this you might as well have a stable job already and this idea of becoming a developer is a plan for the short term future, so at some point, with courses already finished and code already uploaded into GitHub, you will need to decide how much salary you will be willing to let go in order to start on the business.

A trainee position won't pay much. Actually, if it pays at all that's a win already, but you need to start somewhere. For example, you can be a lawyer now and there's no chance your first job as a developer will match your current income. Accept that.

Take your first opportunity on the real world as a way to learn how a company operates for real, how working on a real project looks like. This is your chance to learn the real stuff.

Your first job might be a sacrifice in terms of money, but after this, with one job experience in your resume, the opportunities will increase exponentially.

I know, it's scary, but come on, you first job won't be a Senior position. Get real, face it, it will be worth it.